Super Easy Ombré Rosette Cake
How to make a super easy ombré rosette cake!
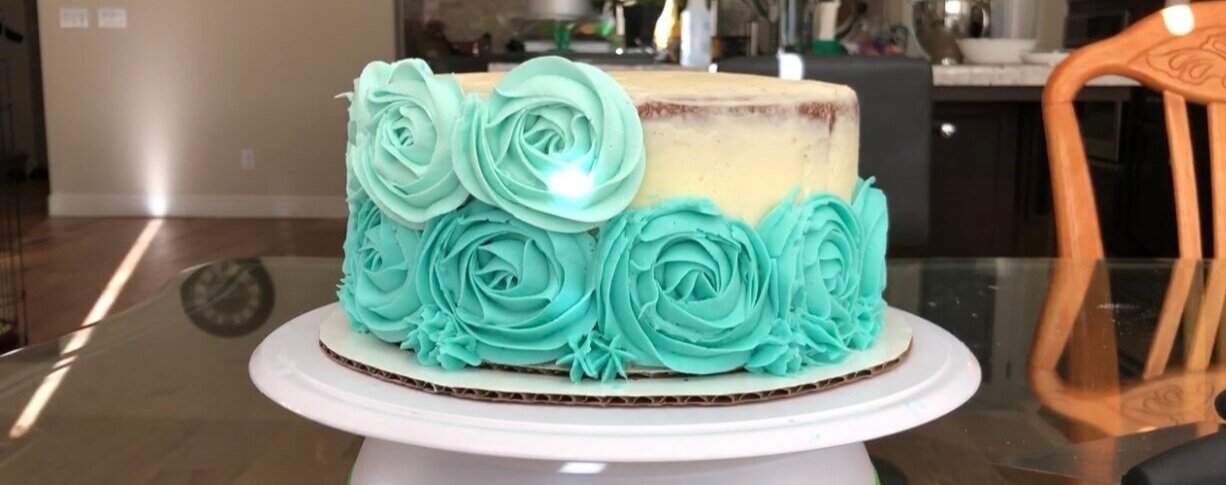
One of my favorite piping methods is using an open star tip to pipe these beautiful rosettes. I used Wilton’s 1M piping tip for this cake. I wanted to add an extra factor to this cake so I made my rosettes in an ombré pattern. Keep reading to learn exactly how to make this super elegant cake that is perfect for any occasion!
For a quicker tutorial, check out my YouTube video:
Crumb Coat
For the crumb coat, I like to use a piping bag to avoid any extra messes but there are times where I am too lazy to fill a piping bag so I just scoop the frosting onto the cake layers. It honestly just depends on my mood.
If you’ve read my previous “How To” blog posts, you know I live and breathe my offset/angled spatula. I use the Oxo Good Grips one, but honestly the Wilton one is the same just with a different material for the handle.
Using the offset spatula, I even out the frosting and add the next layer. It’s important to make sure you’re adding your layers on straight otherwise your cake will be crooked. I like to double check by running my hands along the sides.
When I add my last layer, I always add it upside down. This minimizes the amount of crumbs that are exposed on the outside of the cake.
Once all the layers are stacked, I fill in frosting between the layers. I’ve noticed if you use a piping bag for this step, the process goes by significantly quicker.
I then smooth out the frosting using my offset spatula. Once I’m satisfied with the crumb coat, I place the cake in the freezer for about 20 minutes.
Ombré Frosting
The trick for creating the perfect ombré frosting is to start from dark to light. I always color my darkest color first. Once I’m happy with the shade, I move the frosting to a separate bowl. DO NOT wash the previous mixing bowl.
Since the mixing bowl will have some of the darker frosting remnants, when you add the white frosting to the mixing bowl, the new color formed will automatically be a lighter shade of the previous color.
Usually, for the middle shade, I have to add one more drop of gel color to achieve the perfect middle tone. However, for the lighter tone, the color of the frosting remnants from the middle shade is enough to color the perfect light shade.
For this cake I wanted my light shade to be a pure white so I opted out of this last step.
Rosettes
You can pipe rosettes with any open star tip. I like to use Wilton’s 1M tip for larger rosettes, but if you like smaller rosettes you can try using Wilton’s #21 tip.
To create a rosette, put mild pressure on your piping bag, and move slightly upward before circling around. Circle around until your rosette is the size you want. If this is confusing, watch my video tutorial for a visual.
I always pipe a practice rosette on a plate before piping on my cake. This is to ensure the consistency of my frosting is exactly how I want it.
Once I’m happy with my practice rosette, I start piping the rosettes on my cake. You will have some open spaces. Don’t worry, we will cover those up with small stars.
When you move on to your second row of rosettes, it’s important to pipe the new rosettes in between the old ones. This helps minimize the amount of open space left. I also like to create a little overhang when I pipe my last row. This helps seamlessly join the top layer of rosettes.
Once the sides of my cake are covered with rosettes, I cover any open spaces with small stars. Remember to use the right shade.
I then move on to the top of the cake. I start piping rosettes along the outline of the cake and make my way inwards. Again, cover any open spaces with small stars.


