

New Year's Cake with Champagne Buttercream
How to make a super cool New Year’s cake!
One of my all-time favorite bakers, Chelsweets, made a “One Glass Too Many” cake a few years ago. The cake had a red wine glass inserted upside down onto the top of the cake and had dark red drips to mimic red wine.
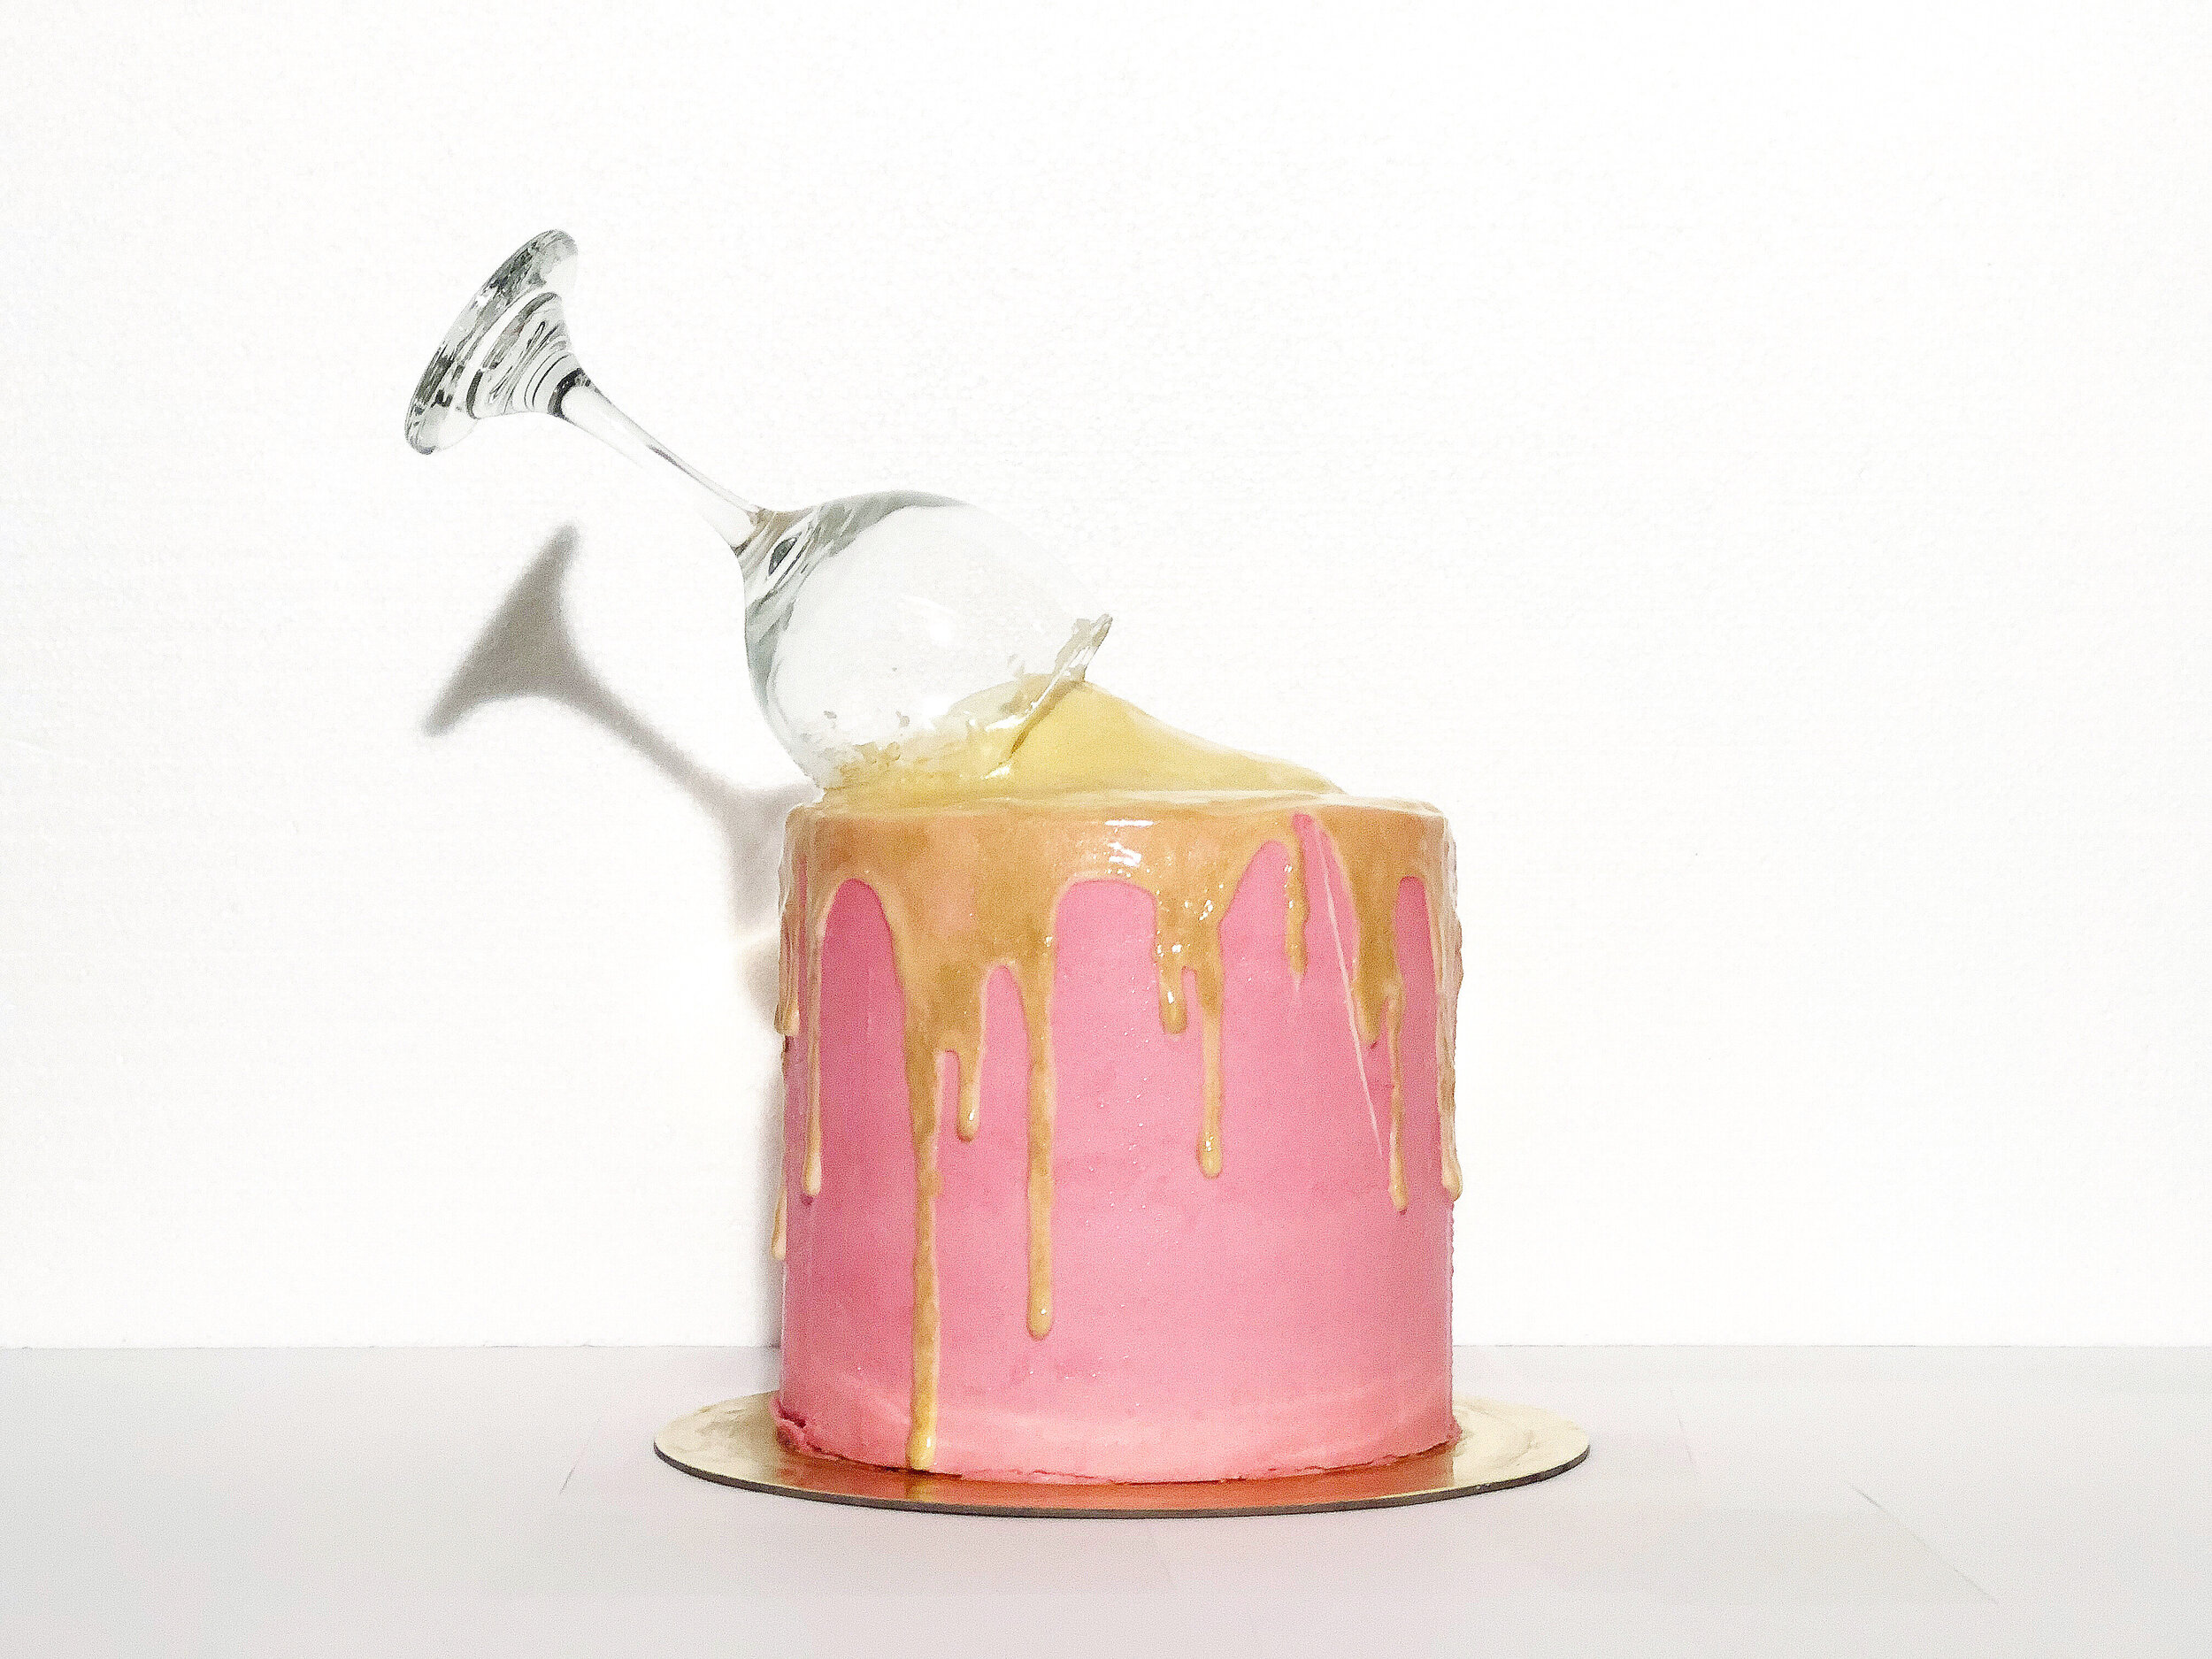
This New Year’s I decided to put my own spin on her cake. I used a champagne glass and added gold drips to the cake. I also made the buttercream champagne flavored.
If you want to know how to make this super fun cake, keep reading!
For a quicker tutorial, watch my YouTube video:
Crumb Coat
For this cake, I used vanilla cake layers and champagne meringue buttercream. I’ll be uploading my champagne buttercream recipe soon, so stay tuned!
I wanted this cake to be especially tall so the spill effect would look the best. I typically use three cake layers, but this time I used five.
When I add the last cake layer, I always add it upside down. This reduces the number of crumbs on the outside of your cake. Using my angled spatula, I smoothed out the frosting.

Once I’m satisfied with my crumb coat, I put my cake in the freezer for about 15-20 minutes, until its completely chilled.
Smooth Sides
To add the final layer of frosting, I like to use a Wilton 789 tip. I find this tip releases the perfect amount of frosting. It also has a textured side if you want to create a different look.

Once I pipe the frosting on the cake, I use my bench scraper to smooth out the sides. I use my small angled spatula to add frosting to the open areas, and then use my bench scraper again to smooth out the sides.
This process takes a long time. I like to be super gentle and patient when using my bench scraper. If you scrape off too much frosting, it’ll take you longer to make the sides even again.

Once I’m satisfied with my final layer of frosting, I use my small angled spatula to chip off any excess frosting from the top. Place the cake in the freezer for at least half an hour.
Inserting the Champagne Glass
In order to create an overflow effect, I added a tiny mountain of frosting to the top of the cake. Looking back, it would have helped a lot if the frosting was a similar shade as the drips. I used white buttercream and struggled to cover it all with the ganache drips.

Once you have a little mountain of frosting at the top, take your champagne glass and stick it at an angle into the cake. My cake was extremely chilled, so I struggled a little getting the glass in.

I found my champagne glass at Dollar Tree. I really did not want to use a champagne flute as they have very narrow mouths or openings. I believe this technique works best with a glass that has a larger mouth.
I then placed the cake in the freezer for another 15 minutes.
White Chocolate Ganache Drips
To add the drips, I added steaming heavy cream to white chocolate chips to create a white chocolate ganache. I’ll be uploading a recipe soon so stay tuned!
For the top of the cake, I just dumped some ganache straight from the bowl and used my small angled spatula to spread it all over the top of the cake and the mountain of frosting.
Once the top was covered, I moved the ganache into a piping bag and added the drips to the sides of the cake. I normally try to be super careful when I add my drips. However, for this cake, I just went a little crazy. I think it looks better when the drips are a little messier.

Painting the Drips
To paint the white chocolate drips, I used Sweet Sticks Edible Art Paint in Champagne Gold. Make sure your drips have completely set before moving on to this step.
It’s important to use Food Safe brushes when painting! I use these Wilton brushes. Food Safe brushes prevent little bristles from falling into your food!
When painting the drips, I used the larger brush for the top and switched to a smaller brush for the ends of the drips. This part takes a really long time. It also takes a lot of paint. I almost used an entire bottle of the paint.


